How to Create an AI Character Sheet from One Photo

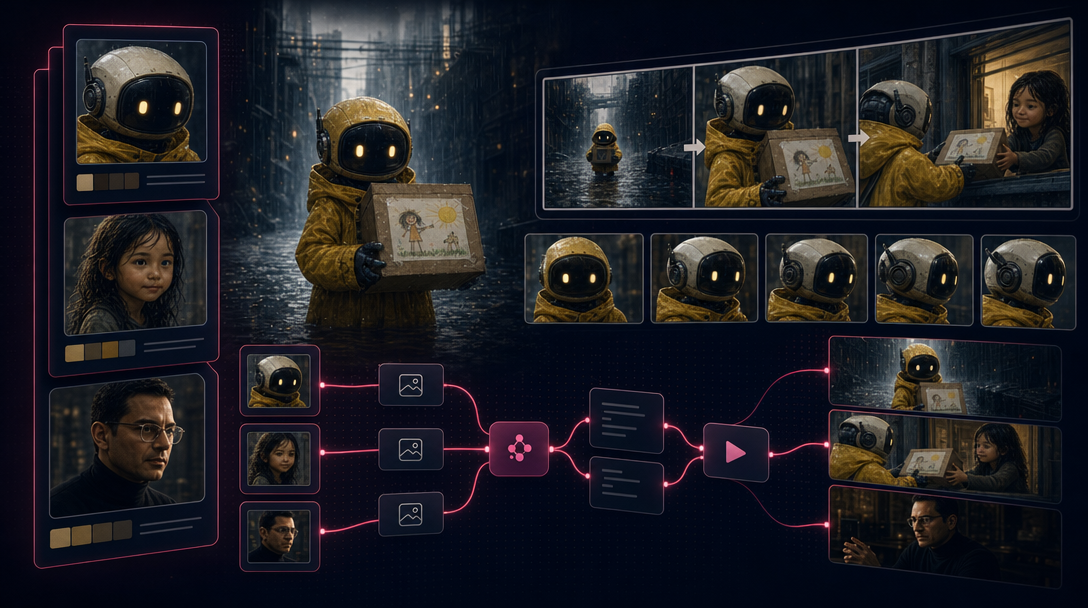
Horizontal AI character reference sheet with front, three-quarter, and expression panels on a neutral background
You have one good photo. Maybe a portrait, a product packshot, a concept still from Midjourney. You run the next generation and the jawline shifts. The label on the box moves. The hoodie color drifts from navy to charcoal. By scene four you are fighting the model instead of editing the film.
A character sheet (or product reference sheet) puts the important views on one canvas before you burn credits on scenes and motion. One upload, one horizontal layout, one URL you wire into everything downstream.
This guide covers what belongs on that layout, how to build it from a single photo, and where it sits in an AI film or ad pipeline. If you want to run the workflow first and read the QA notes after, open the Character and Product Sheet Generator and come back here.
Quick answer: Upload one reference image, choose Auto, Character, or Product, add optional notes (materials, outfit, required views), then generate a 16:9 multi-panel sheet saved to your TheFluxTrain bible. Use that sheet as the canonical reference for image generation, video, and Flow Studio. Do not re-describe the subject from memory each scene.
Ready to generate? Create a reference sheet from one photo. If you need to sign in first, your upload and notes stay in browser storage until you return.
What is a character or product reference sheet?
Think of it as production art for one subject. A mood board pulls from ten Pinterest tabs. A reference sheet locks one face, one SKU, one mascot.
Character sheets usually include:
- Full-body neutral pose
- Front and three-quarter face
- Side or back head profile when hair or costume matters
- Two or three expressions if the subject performs on screen
Product sheets usually include:
- Front, side, and back hero angles
- Top or detail view when shape or packaging matters
- Close-ups for texture, finish, logo, or controls
- Consistent studio lighting across panels
The layout is horizontal, often 16:9, so you can drop it into storyboard reviews, ad decks, and model reference slots without cropping half the panels away.
I ran animation work before AI was part of the stack. We kept turnaround folders for every character, same idea as a model sheet on paper. When someone skipped that step, the inbetweens drifted. Generative models drift for the same reason when you only give them prose.
If you are building continuity across a short film, read How to Maintain Character Consistency Across an AI Film next. That article covers the full bible. The sheet is step one.
Why do you need a sheet before you generate scenes?
Text prompts are good for mood, blocking, and camera language. They are weak anchors for identity. Write "woman in her thirties, short dark hair, green eyes" three times and you still get three slightly different faces, especially when lighting or angle changes.
A sheet gives the model pixels to match. That matters when you:
- Run ten storyboard stills with the same cast member
- Batch product ads that must show the same SKU from different angles
- Build an AI influencer who has to look like one person across posts
- Hand a project to a teammate or agent without re-explaining the look every session
My rule is simple. If a new still disagrees with the sheet, I regenerate with references reattached. I do not ship "close enough" and fix it in the edit, because the next scene will drift again.
What goes wrong when you skip the sheet?
These are the failures I see most often on multi-scene projects:
- Scene 1 and scene 5 show the same role with different nose shapes because only the text prompt carried over.
- A product ad set uses the right color in the hero frame and the wrong label font in the lifestyle frame because the packshot never became a shared reference.
- An influencer series alternates between two faces that both "kind of" match the brief.
- A Flow Studio graph runs branch A with a reference image and branch B from memory. Branch B always wins the race to look wrong.
The fix is boring and it works. One preview, one sheet, same URLs on every branch.
What makes a good input photo?
You do not need a studio. You need structure the vision step can read.
For characters:
- One obvious subject. Crowd shots confuse the layout.
- Face and shoulders visible, front or three-quarter.
- Even lighting. Harsh shadow across half the face makes later panels harder.
- Plain or simple background. The generator can normalize this in the sheet output.
For products:
- Sharp focus on edges and branding.
- Minimal glare on reflective packaging.
- Full object in frame with a little margin.
- True color. Heavy Instagram filters lie about material finish.
Use the optional description field for facts the photo does not show. Examples that work:
- matte black sole, white stitching only on heel tab
- silver ear cup, no logo change, keep cable port on left
- child age eight, freckles, red hoodie, no glasses
The tool merges those lines into the sheet prompt. Skip poetry. List constants.
Note- If the only photo you have is a wide group shot, crop to one subject first. The sheet generator expects one anchor, not a cast photo.
How do you create an AI character sheet from one photo?
Step 1 — Open the generator and upload
Go to the Character and Product Sheet Generator. Upload JPG, PNG, or WebP.
The uploaded image becomes the locked preview. There is no separate mug-shot step in this workflow. What you upload is what the sheet prompt analyzes.
Step 2 — Choose subject type
| Mode | When to use it |
|---|---|
| Auto | Let vision infer character vs product from the image |
| Character | People, creatures, mascots, illustrated heroes |
| Product | SKU, packaging, footwear, hardware, props with no face |
If Auto picks the wrong layout on the first pass, switch to Character or Product and run again with clearer notes.
Step 3 — Add optional description notes
Write short constants: wardrobe, materials, brand colors, expressions you need, angles you must see.
Example block you can paste and edit:
Default outfit: grey zip hoodie, black jeans, white sneakers.
Include neutral, smiling, and surprised expressions.
Add left and right profile headshots.
Keep illustrated cartoon style from the reference. No photoreal conversion.
For a product:
Front, back, and three-quarter hero angles.
Close-up on embossed logo and USB-C port.
Matte white plastic, no invented color variants.
Step 4 — Sign in and generate
Sheet rendering uses credits. On TheFluxTrain that is GPT Image 2 at 16:9 medium quality with one reference input. The page shows the estimate before you click generate.
If you are logged out, your image and form stay in browser storage until you return from sign-in. You will not re-upload from scratch.
Step 5 — Download and save to your bible
The tool creates a character bible folder, registers your preview, and stores the sheet in character_sheets. Open the saved bible from the result screen anytime.
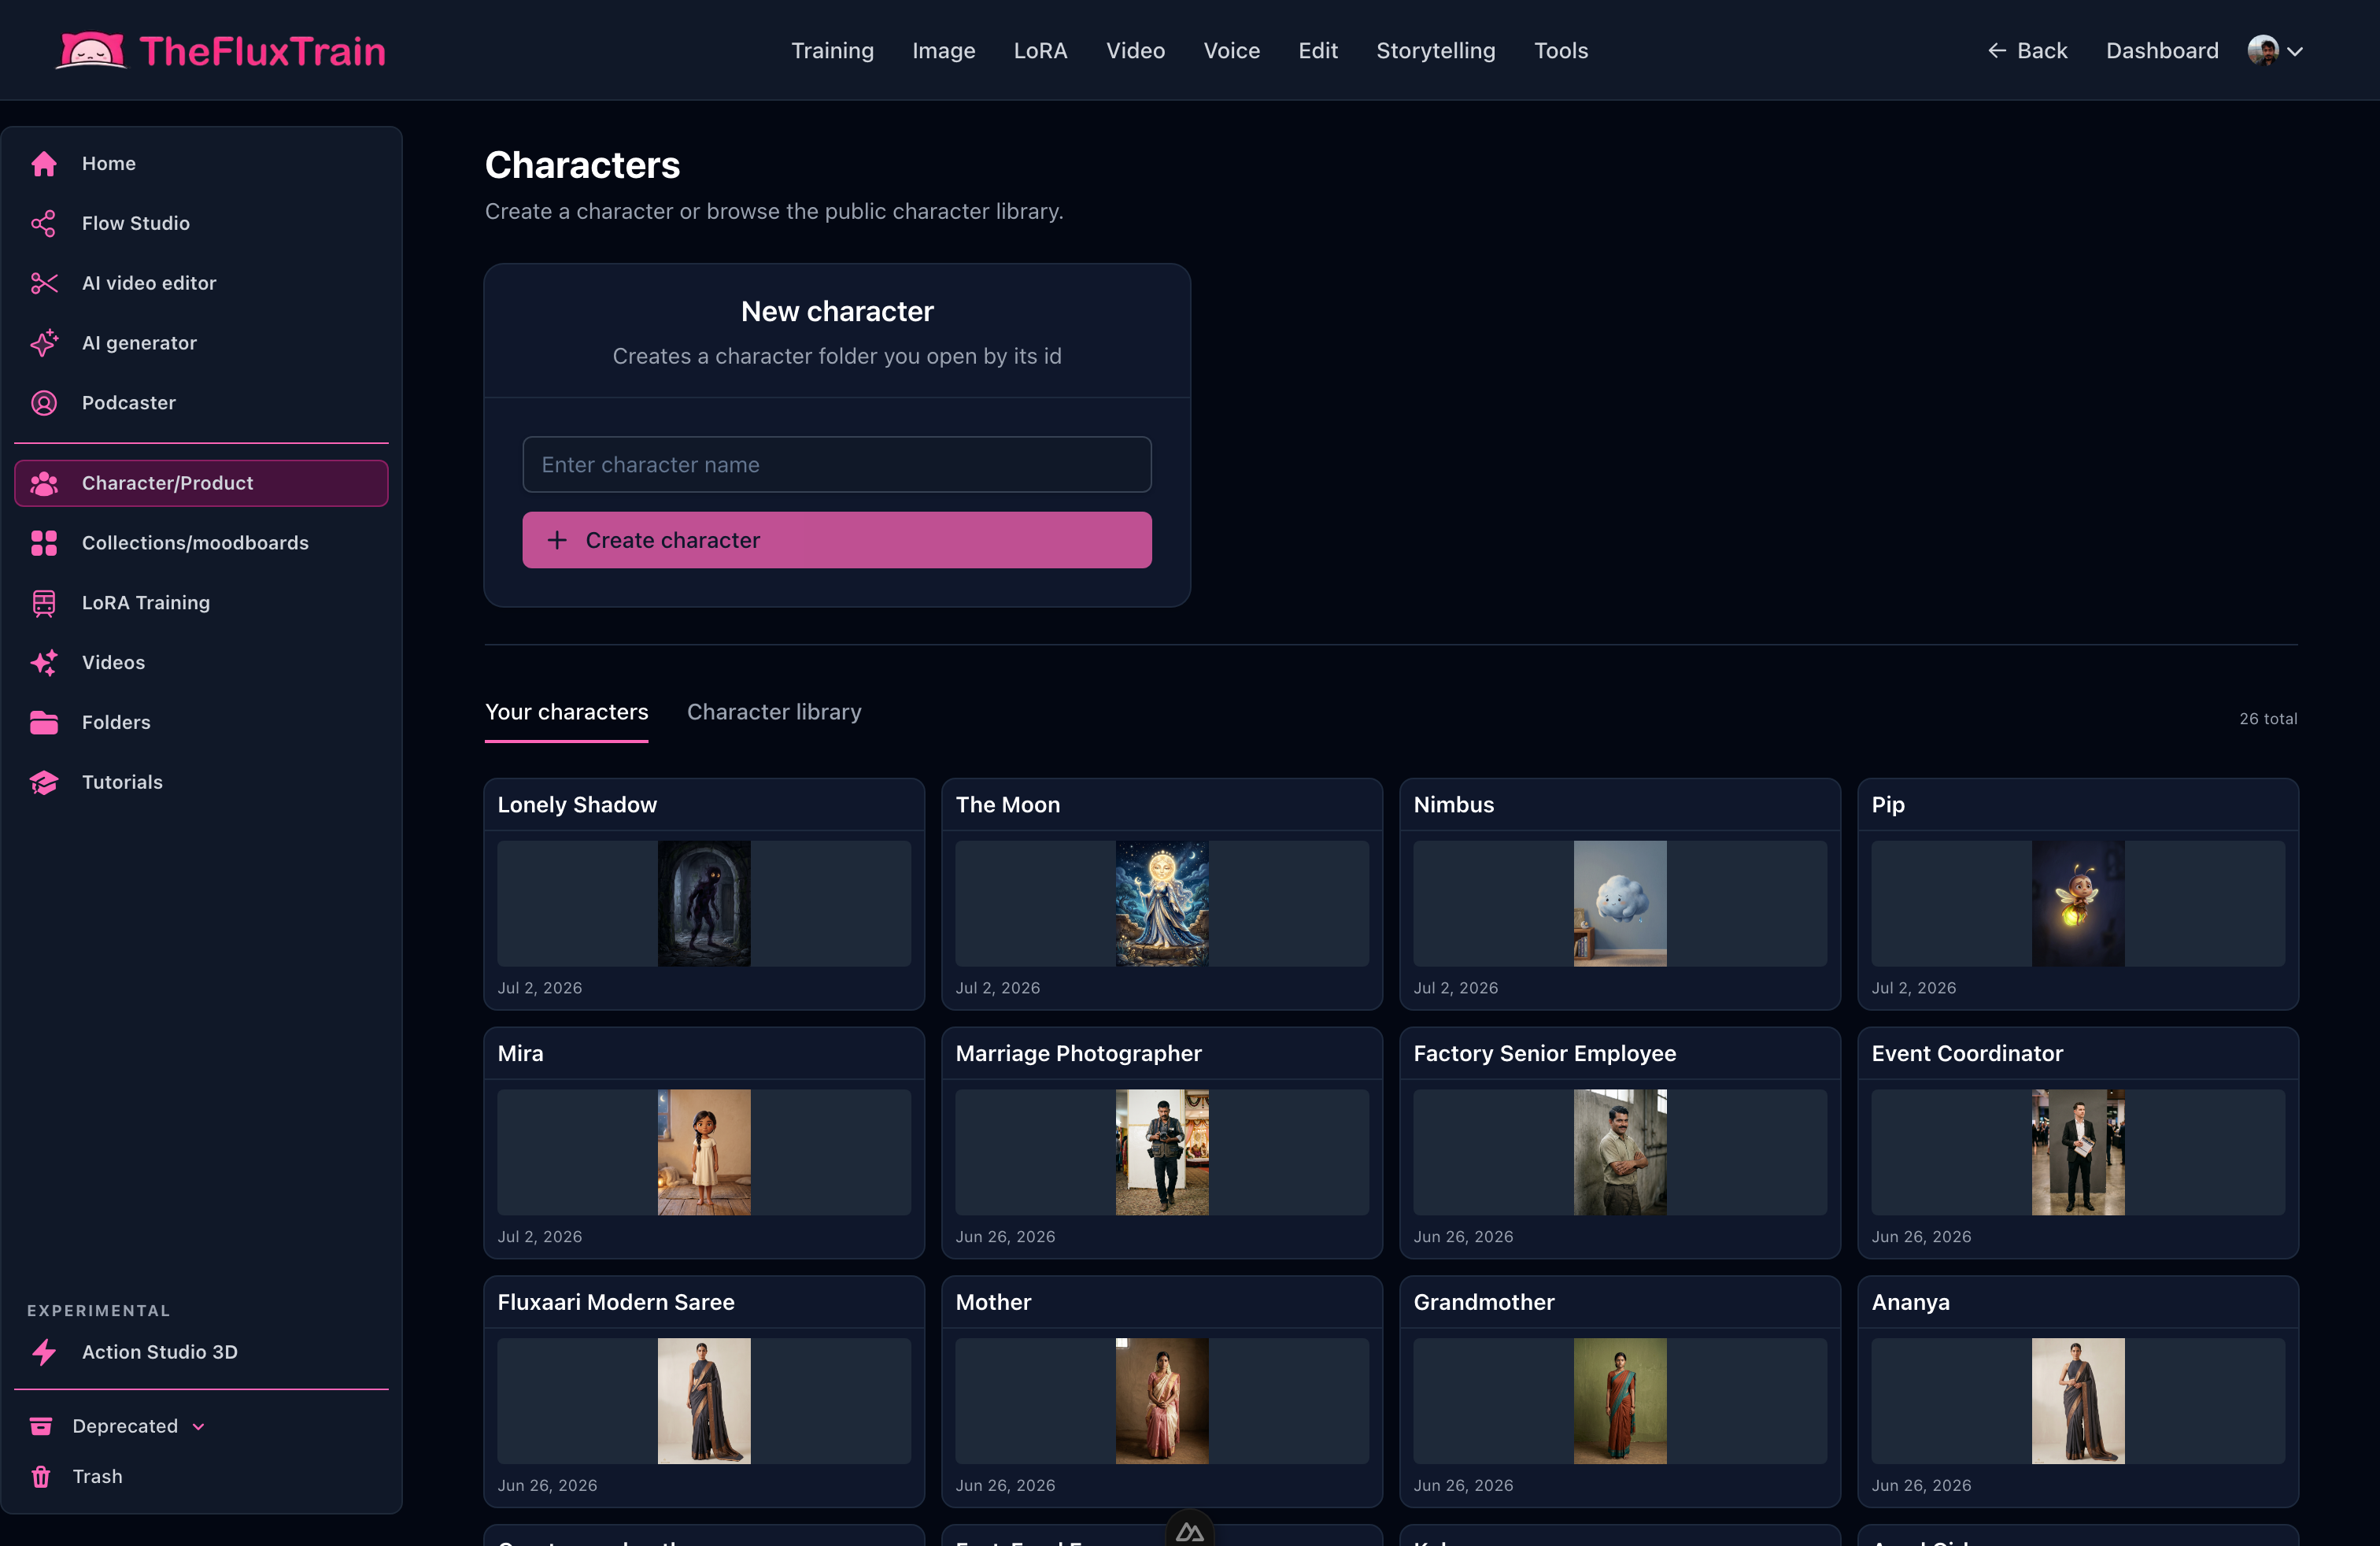
One folder holds the preview you uploaded and the generated sheet. Downstream image and video steps should read from here, not from chat memory.
What should be on the finished sheet layout?
For characters, I expect full-body on a neutral background, mug shots (neutral, smiling, surprised when the subject is human), left and right head profiles, consistent lighting, and a horizontal style-sheet arrangement.
For products, I expect front, three-quarter, side, back, optional top view, material close-ups, and no invented logos or features that were not in the reference photo.
If the first pass misses a panel, regenerate with clearer notes. "Include sole tread close-up." "Add waving pose." Do not try to fix a missing angle by editing scene prompts alone. The scene prompt does not replace the sheet.
How do you use the sheet in an AI workflow?
After download:
- Image generation — Send preview plus sheet as reference images on Image from reference.
- Video — Use the sheet or an approved still as the start frame on Image to video.
- Flow Studio — Wire the bible folder into a Character input node on Flow Studio.
- Influencer campaigns — Pair the sheet with the AI Influencer Creator template for recurring posts.
- QA — Batch-score face variants with the Face Similarity Checker when the subject is human.
Browse related utilities under Character and product assets on the tools hub.
When I batch-check character stills, I lock one preview URL and rank variants against it. The sheet gives the model more pixels to agree on. The face score tells me which render is worth approving before I pay for video.
Character sheet vs product sheet
| Character sheet | Product sheet | |
|---|---|---|
| Primary goal | Same face and body across scenes | Same SKU geometry and labeling |
| Typical panels | Turnarounds, expressions | Hero angles, material details |
| Common mistake | Regenerating the face per scene | Describing color in text instead of showing the packshot |
| TheFluxTrain home | Saved character bible | Same folder workflow (product uses the same bible type) |
What limits should you expect?
One reference in, many views out. The model infers unseen angles. Extreme poses or occluded branding may still need a reshoot or a second reference photo.
Sheet generation is not browser-local on TheFluxTrain. Sign-in and credits apply.
This is creative production art, not a legal spec sheet. Do not use generated sheets for regulatory labeling sign-off without human review.
The sheet preserves the art style in your upload: photo, 3D, illustration. It will not silently turn a cartoon into a photoreal render.
When likeness still drifts after the sheet exists, reattach the same preview URL and sheet URL on every generation branch before you blame the scene prompt. Nine times out of ten the reference got dropped on one branch.
When should you regenerate the sheet vs reshoot the input?
Regenerate when:
- One panel is missing (back view, sole detail, extra expression)
- The layout is right but lighting is inconsistent between panels
- You forgot a constant in the description field (logo color, outfit detail)
Reshoot or replace the input photo when:
- The face is blurry, heavily filtered, or half in shadow
- Branding on a product is unreadable at any crop
- You changed the subject entirely (new hairstyle, new SKU colorway)
A better input photo beats a longer prompt every time.
What is the fastest path if you are in a hurry?
- Upload the clearest single photo you have.
- Pick Auto, or Product for SKU work.
- Add three bullet constants in the description field.
- Generate once, download PNG, open the saved bible.
- Run your next storyboard still with both preview and sheet wired in.
That pass takes a few minutes. It saves more regeneration time than polishing prose prompts for an hour.
Frequently asked questions
What is an AI character sheet?
A character sheet is one horizontal reference image with the same subject from multiple views, usually full body, face angles, expressions, or outfit details, so later AI generations stay consistent. Product sheets swap expressions for front, side, back, and detail panels.
Can you make a character sheet from one photo?
Yes. Upload a clear reference, add any constants in the description field, and run a sheet generator. The original photo anchors face shape, colors, and silhouette. The model fills in angles you did not photograph.
What is the difference between a character sheet and a mood board?
A mood board collects inspiration from many sources. A character sheet is canonical art for one subject. Every scene should inherit the sheet, not grab a new look from a Pinterest grid.
Does this work for products as well as people?
Yes. Use Product mode or Auto when the reference is packaging, footwear, electronics, or any physical SKU. The layout should emphasize hero angles and material close-ups, not facial expressions.
Do you need design software to build a reference sheet?
No. Browser tools can upload one image, derive a sheet prompt with vision, and render a 16:9 PNG into a character bible. Export to Photoshop later if you want manual touch-ups.
When should you create the sheet in an AI film workflow?
Before storyboard stills and long before image-to-video. Lock the preview and sheet in pre-production so every downstream shot inherits the same face, wardrobe, or product geometry.
How many credits does a sheet cost on TheFluxTrain?
Sheet generation uses GPT Image 2 at 16:9 medium quality with one reference input. The Character and Product Sheet Generator page shows the live credit estimate before you click generate. Sign-in is required because the sheet saves to your bible library.
What should you do after the sheet is ready?
Download the PNG, open the saved bible, wire references into image or video generation, or drop the character folder into Flow Studio. Reuse the same sheet URL on every scene that features that subject.
Thats the workflow I use before any multi-scene AI film or product ad batch. If a sheet comes back missing a panel, note which view failed and add it explicitly in the description field on a second run. Put questions in the comments if you hit a weird edge case with a specific file type or subject.
Cheers!