
How to Maintain Character Consistency Across an AI Film

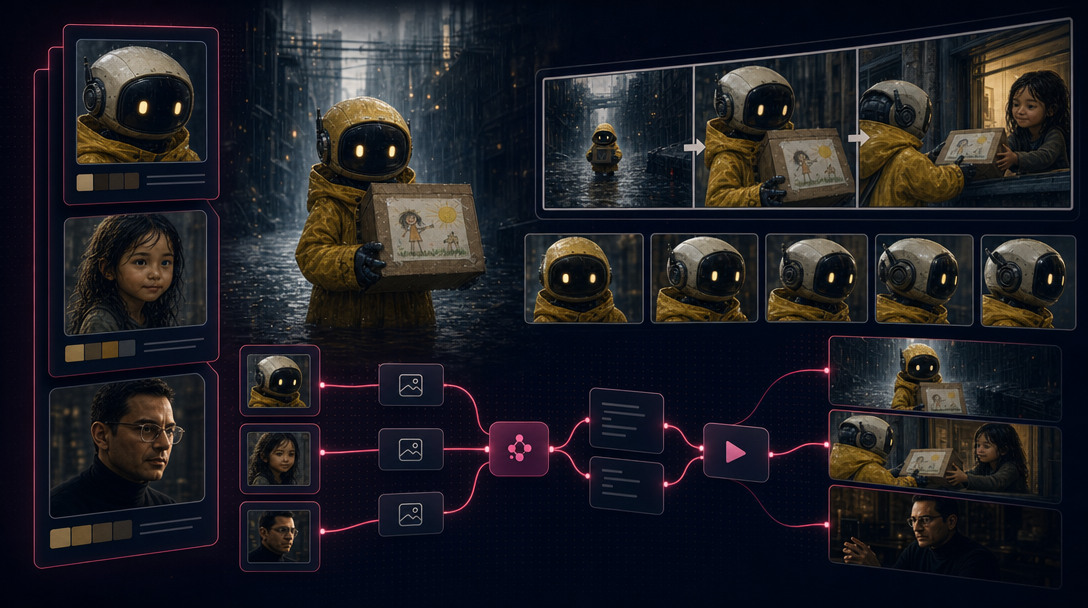
Stylized collage of character bible portraits, storyboard face plates, and Flow Studio character wiring for AI film continuity
You finish scene three. Your protagonist looks like a different person—new jawline, different hair, jacket color shifted from navy to charcoal. Scene five adds a backpack that never appeared in scene two. By the final cut, your lead character feels like four loosely related cousins rather than one person.
This is not a failure of taste. It is the default behavior of generative image and video models. Each call is a fresh guess unless you give the system something stable to hold onto. Character consistency is not a single trick; it is a production discipline—reference assets, written rules, and validation at the scene level—applied before and after every generation.
If you are new to vibe video as a way of working, start with What Is Vibe Video? The New Way to Create Films by Talking to AI. If you have not run a full project yet, How to Create Your First AI Short Film with Claude and TheFluxTrain walks through the end-to-end path where character work usually begins—including storyboard panels before motion.
Why characters drift (and why prompts alone are not enough)
Text prompts are excellent for mood, blocking, and camera language. They are weak anchors for identity. A model can read "woman in her thirties, short dark hair, green eyes" and still vary face shape, skin tone, and proportions between runs—especially when you change lighting, angle, or model.
Drift accelerates when you regenerate without re-attaching references, describe wardrobe in prose instead of showing it, switch models mid-project, ask for extreme angles before you have a locked face plate, or let each scene inherit a slightly different "version" from an earlier pass you never discarded.
The fix is to treat your character the way a live-action production treats a cast member: canonical references, a written bible, and a continuity pass before you move on.
Step 1: Build a character bible before you generate scenes
A character bible is the single source of truth for who this person is on screen. It is not just a pretty portrait. It is a small bundle of assets and notes that every downstream step can point to.
Minimum bible contents:
- Name and one-line story role — "Mara, ex-detective, guarded but fair."
- Preview image — A clear, front-facing or three-quarter portrait. Neutral expression works best for reuse. Avoid dramatic lighting that obscures facial structure.
- Character sheet — A wider layout showing face, hair, body type, and default outfit from more than one angle when possible. This is what you wire into generations that need full-body or side views.
- Written constants — Hair color and style, eye color, skin tone, age range, distinguishing marks (scar, tattoo, glasses), default outfit, and footwear. Write these as facts, not poetry.
- Do-not-change list — Explicit negatives help agents and models alike: "No beard," "No glasses in interior scenes," "Jacket always burgundy, never black."
Create the bible once, at the start of pre-production, before storyboard panels or scene clips. Every scene should inherit from this folder—not from whatever image looked good in the last chat turn.
Reference images vs. character sheets: A reference image is any still you trust (photo, generated portrait, storyboard frame). A character sheet is a structured layout meant to survive angle changes. You need both roles filled: the preview for face locks, the sheet for wardrobe and silhouette. Do not substitute ten random mood boards for one canonical sheet.
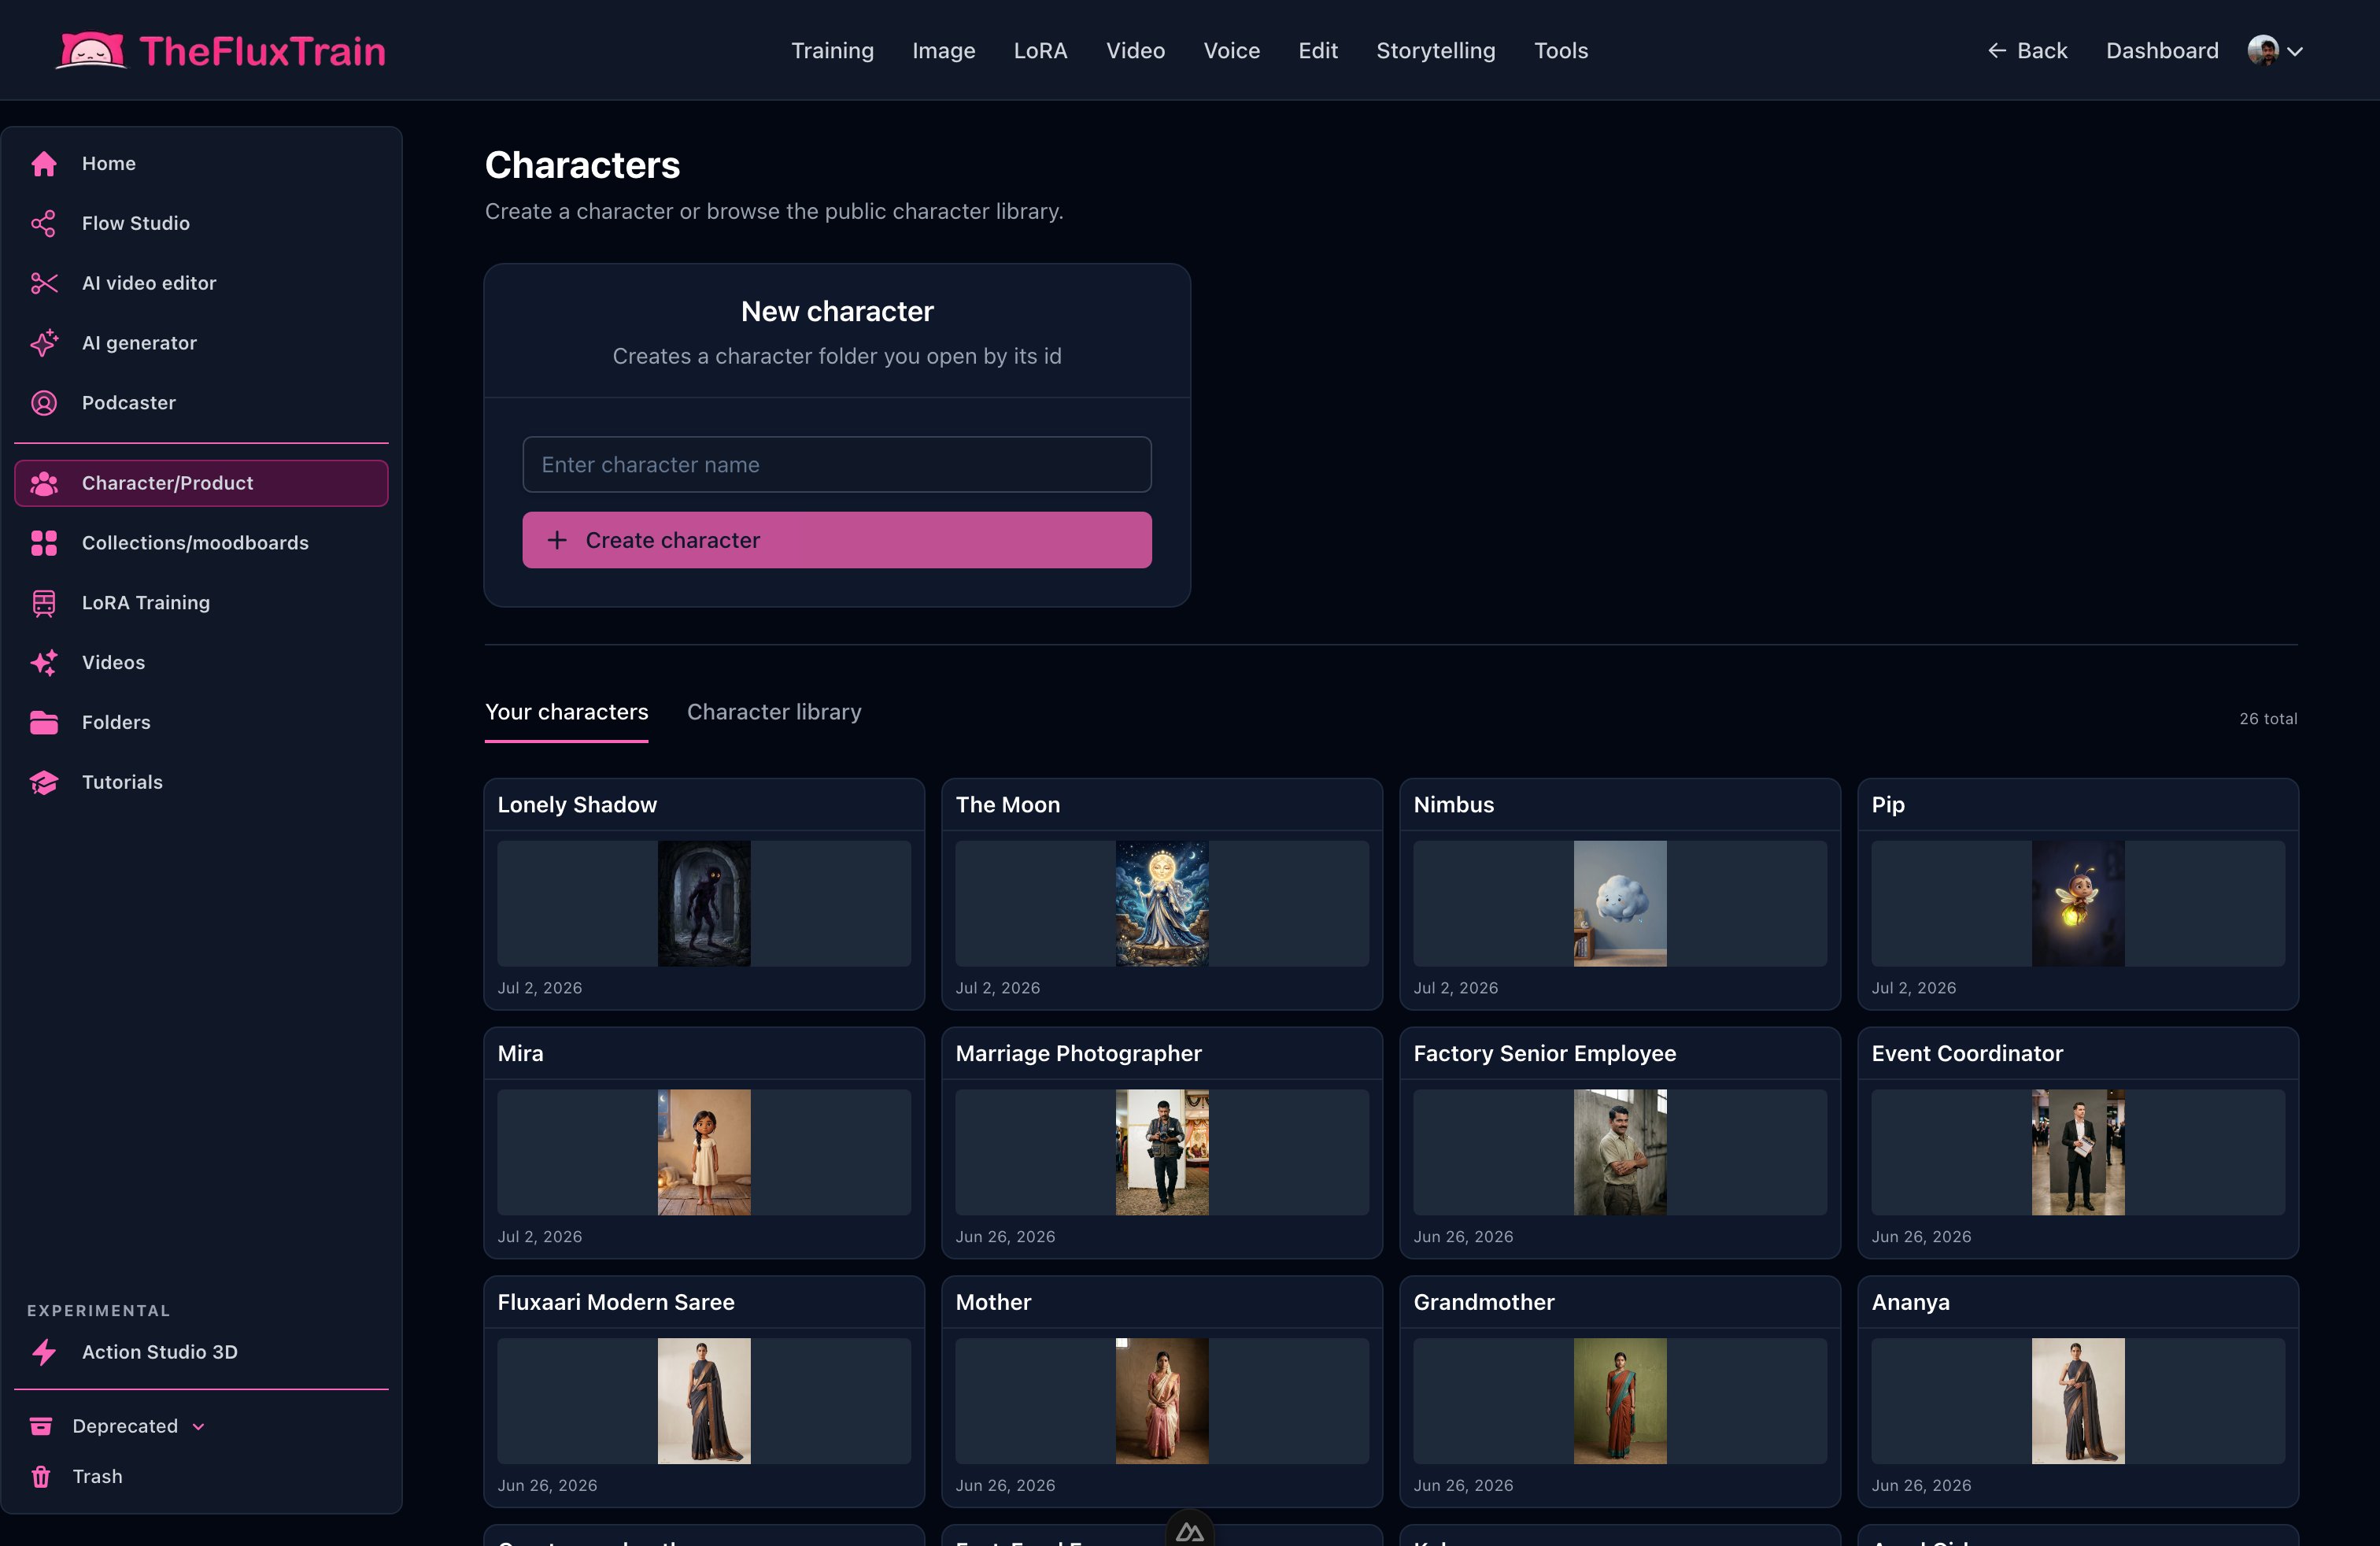
Create one character folder with a locked preview and sheet—every downstream scene inherits these references, not a new description each turn.
Step 2: Lock facial consistency before you chase motion
Faces are where audiences notice drift first. Video models in particular will trade likeness for motion if you have not established a strong still anchor.
Practical order of operations:
- Approve a preview you would recognize in a lineup.
- Generate still storyboard frames (or key frames) with that preview wired in as a reference—not only a text description.
- Only then move to image-to-video or reference-to-video, using the approved still as the visual anchor.

Approve still storyboard frames with the same face plate wired in—fix the likeness here before you pay for video.
Facial consistency tactics that actually help:
- Same preview across scenes — Reuse one approved portrait URL or file; do not "improve" the face per scene unless the story requires it.
- Consistent framing early — Establish close-ups and medium shots before wide shots that show less facial detail.
- Limit per-scene adjectives — "Tired, tearful, angry" belongs in performance notes; bone structure and eye color belong in the bible.
- Regenerate the still, not the video — If the face is wrong in motion, fix the key frame first. Patching video when the underlying likeness is off wastes time and credits.
Honest limit: No workflow guarantees pixel-perfect identity across every model and angle. You are managing acceptable continuity for your runtime and audience—not forensic matching. Plan for a handful of hero shots where the face must be perfect, and be willing to cut or replace wide shots where likeness matters less.
Step 3: Clothing, props, and continuity you can enforce
Wardrobe drift is subtler than face drift but equally distracting: collar styles change, logos appear and vanish, hemlines move. Props teleport in and out of pockets.
Clothing continuity
- Put the default outfit on the character sheet with enough detail to survive side and three-quarter views.
- For story-driven wardrobe changes (act two jacket swap), create a second sheet state in the bible—"Mara, rain scene, yellow raincoat"—rather than describing the coat only in scene prompts.
- List hex-adjacent color language in the bible ("burgundy wool coat, not wine, not brown") and repeat it in scene briefs.
Prop continuity
- Maintain a prop list per character: bag, watch, badge, weapon, phone. Mark whether each is "always on person" or "scene-specific."
- For recurring props, add a small reference still to the scene folder, not only to the character bible.
- In your screenplay or beat sheet, tag props at the beat level so your director agent does not invent a briefcase in scene four that was never in scene one.
Scene-to-scene handoff
When scene N ends with a character holding an object, scene N+1 should either show the same object or explicitly script its absence ("she left the envelope on the table"). Silent continuity errors read as sloppiness even when the face is perfect.
Step 4: Scene-level validation checklist
Before you mark a scene approved and move on, run a short continuity pass. This takes minutes and saves hours of rework in the edit.
Scene validation checklist
| Check | Question |
|---|---|
| Face | Does the lead match the approved preview at this angle and lighting? |
| Hair | Length, color, and style consistent with bible? |
| Wardrobe | Correct outfit state for this story beat? |
| Props | Every carried object accounted for from the prior scene? |
| Marks | Scars, tattoos, glasses present or absent as specified? |
| Cast | Background characters do not steal the lead's face (a common diffusion artifact)? |
| Aspect | Same aspect ratio and rough lens feel as adjacent scenes? |
If any row fails, do not patch in the timeline first. Regenerate or re-edit the still with references reattached, then re-run motion. Approving a drifting scene because "we can fix it in post" usually means you will never fix it.
Keep a simple log per scene: approved preview URL, outfit state, open props, and one sentence on what changed from the previous scene. Your future self—and any agent you work with—will need that paper trail.
Step 5: Wire character bibles into your generation graph
Tools matter less than discipline, but the right tool should not fight you. On TheFluxTrain, character work is designed around reusable character folders—the same bibles you curate in the Characters area—not one-off uploads scattered across nodes.
Character bibles in the product
- Create a character folder per cast member.
- Set a preview (portrait plate) and character sheet (wide reference) as the canonical outputs for that folder.
- Update the bible when wardrobe state changes; downstream flows read the current selection.
The input-character node
In Flow Studio, add a Character input node near the start of your graph. Select the character from your library once. The node exposes two image outputs—Preview and Character Sheet—that you fan out to every branch that needs that cast member.
That pattern matters for two reasons. First, you stop re-uploading the same files in five places (and accidentally using an old version in one branch). Second, when you fix the bible, every wired branch can pick up the updated URLs on the next run instead of hunting orphaned uploads.
Wire preview to nodes that need facial likeness; wire the sheet when body, costume, or multi-angle context matters. You do not need to memorize port names—add the node, connect images downstream, and keep one Character node per cast member per graph.
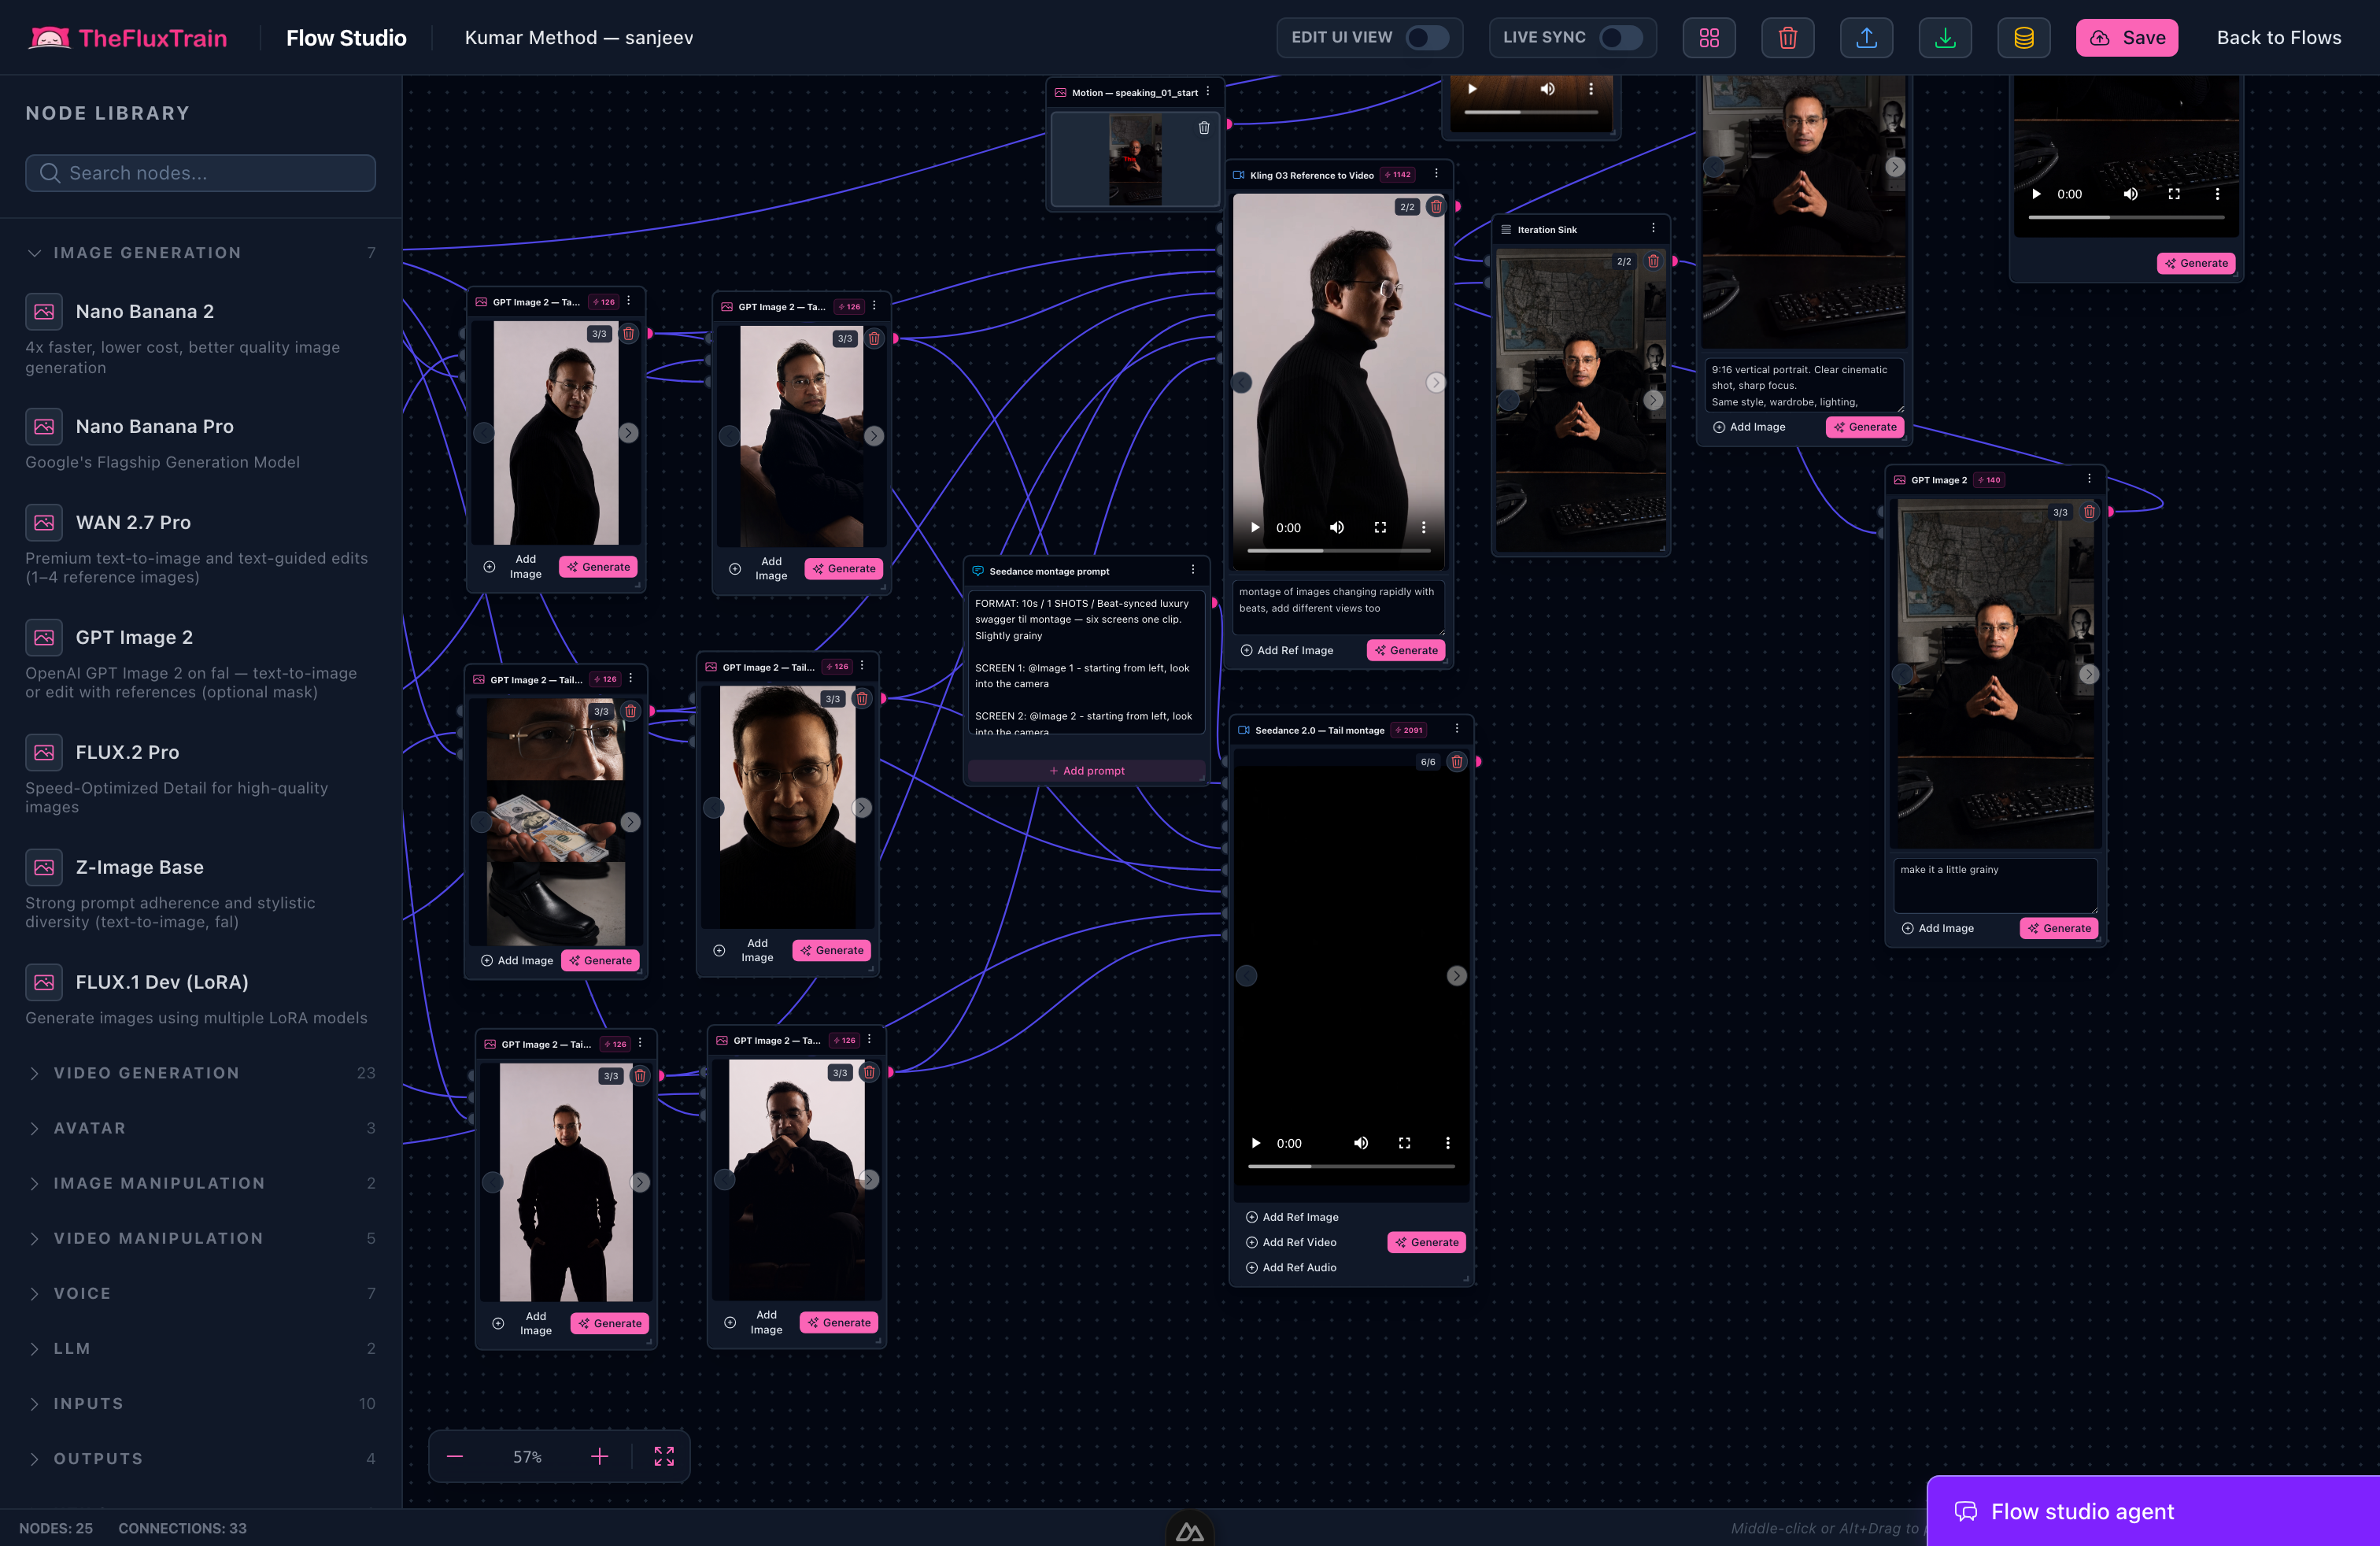
One Character node fans Preview and Character Sheet into every branch—so a bible update reaches the whole graph on the next run.
Agent-friendly production
If you work with Claude as a director, point it at the character ids and bible notes in your project brief. The goal is the same as on a live set: everyone references the same packet. Random "make her look more cinematic" instructions without re-attaching references are how drift returns.
Optional: CLI workflow for character bibles
If you prefer terminal-driven production—or you want scripts that rebuild bibles after a model upgrade—the FluxTrain CLI includes a characters command group. A typical flow: create an empty character, generate or register a preview, derive a sheet prompt from that preview, then generate the sheet. The resulting folder id is what you pass into Flow Studio's Character input node.
This is optional. The browser Characters page and the CLI write to the same library. Use whichever surface fits your session; do not maintain two competing bibles for the same role.
Putting it together: a repeatable workflow
- Define cast in bibles (preview + sheet + written constants) before storyboards.
- Storyboard with references attached—see the first short film tutorial for the storyboard step.
- Approve stills per scene with the checklist; reject drift early.
- Generate motion only from approved stills, with the same character folder wired through
input-character(or equivalent reference wiring in your tool). - Log continuity scene by scene; treat wardrobe and prop state as first-class data.
- Edit with continuity in mind—sometimes the right fix is a different take, not a color grade.
Character consistency is iterative. Your first pass establishes structure; your second pass tightens faces and wardrobe. What is not normal—and not necessary—is accepting a different lead in every scene because prompts felt "close enough."
What to do next
Build one bible for your protagonist this week. Run the scene checklist on your worst two scenes. Replace drift there before you scale to the full film.
When you are ready to run the full pipeline with an agent and a visual studio in one loop, open TheFluxTrain and connect your character folders to your flows. Start from the pillar post on vibe video, follow the first short film walkthrough, and keep storyboards aligned with the same bibles you validate at every scene.
Your audience will not credit you for perfect diffusion math. They will notice when the same person stays the same person from the first frame to the last.